Trekking poles, also known as hiking poles or walking sticks, can significantly enhance your hiking and trekking experience by providing stability, support, and balance. Whether you’re a seasoned hiker or a beginner, choosing the right trekking poles and using them correctly is essential for maximizing their benefits. In this guide, we’ll walk you through the process of selecting and effectively using trekking poles.
Choosing Trekking Poles
1. Consider Your Activity
Determine the type of terrain you’ll be hiking on. If you’re exploring rugged trails or steep ascents and descents, you may benefit from trekking poles with additional features like shock absorption.
2. Adjustable vs. Fixed-Length Poles
Adjustable poles allow you to modify their length to match the terrain and your preferences. Fixed-length poles are lighter and simpler but offer less versatility.
3. Material
Trekking poles are made from materials like aluminum and carbon fiber. Aluminum poles are more durable and cost-effective, while carbon fiber poles are lightweight but may be more expensive.
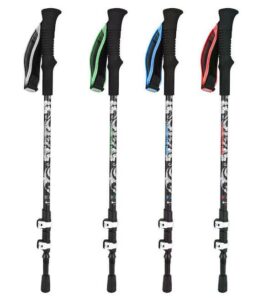
4. Grip and Handle
Choose a handle that’s comfortable for your hand size and grip preference. Common grip materials include cork, foam, and rubber.
5. Straps
Look for adjustable and padded wrist straps that help distribute the load and prevent strain on your wrists.
6. Tips and Baskets
Consider the type of tip you need based on the terrain. Rubber tips are ideal for hard surfaces, while carbide tips are suitable for rocky trails. Removable baskets prevent the poles from sinking into soft ground.
Using Trekking Poles
1. Adjust the Length
For uphill sections, shorten the poles. For downhill sections, lengthen the poles. On level ground, adjust them to your comfort.
2. Wrist Strap Placement
Slide your hand up through the wrist strap from below. The strap should be snug but not overly tight, allowing your hand to relax on top of the grip.
3. Proper Pole Placement
Place the poles slightly ahead of your body with each step. This provides stability and balance, particularly on uneven terrain.
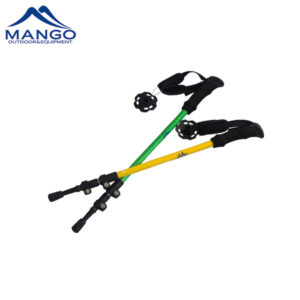
3 section Trekking Poles for Mountain Climbing
4. Uphill Technique
Shorten the poles for uphill climbs. Use the poles to support your upper body weight as you push yourself upward.
5. Downhill Technique
Lengthen the poles for downhill descents. Plant the poles ahead of you to reduce impact and ease pressure on your knees.
6. Crossing Obstacles
When crossing streams or rocky terrain, use the poles for stability and to test the ground before placing your full weight.
7. Uphill Technique
Shorten the poles for uphill climbs. Use the poles to support your upper body weight as you push yourself upward.
8. Proper Storage
When not in use, collapse and secure the poles. This prevents them from getting tangled in vegetation or other gear.
Conclusion
Trekking poles can greatly enhance your hiking experience by providing stability, reducing strain, and improving balance. Selecting the right poles based on your activity and preferences is crucial. Mastering the proper techniques for adjusting, gripping, and placing the poles will help you make the most of their benefits while exploring the great outdoors. Remember that practice makes perfect, so take the time to become comfortable with your trekking poles before embarking on your next adventure.